
Parameters
Box Dimensions
Dimensions including finger joints (total part size)
Outer width of the box
Outer height of the box
Outer depth of the box
Material
Material thickness (e.g. plywood, MDF)
Gap between parts in the layout
Fingerjoints
Classic finger joints on all edges
Target width per finger (adjusted automatically)
Minimum fingers per edge
Hinge
Clearance for smooth rotation
Lid overhang over the front edge (0 = flush)
Lateral clearance between lid and side walls (0 = none)
Side walls drop to the front wall's height, the lid rests on all four walls
Full-height front wall with a central notch the lid tab rests in
Hinged Lid Box Designer
Create parametric wooden boxes with a hinged lid. The pin hinge uses tabs on the lid that engage with round cutouts in the side panels to form the pivot – no hinge hardware required.
Pin hinge
The lid has pin tabs on its sides that sit in round cutouts in the side panels and act as the axis of rotation.
Configurable lid
Lid overhang, lid clearance and hinge clearance can each be adjusted individually. Optionally the lid also rests on the side walls, or the front wall rises to full height with a central notch for a lid tab. An enclosed build with smooth end walls is available as well.
SVG, DXF & PDF export
Export your design for laser cutters and CNC routers. All parts are laid out flat and ready to cut.
Tips for hinged lid boxes
- Material: 3–6 mm plywood or MDF works best. Thinner material can become unstable on larger boxes.
- Hinge clearance: A little clearance keeps the rotation smooth. Too little and the hinge binds, too much and the lid wobbles.
- Test cut: Do a test cut of the hinge area first to check the fit before cutting the whole box.
- Assembly: The lid must be assembled together with the side panels – the pin tabs cannot be inserted into the cutouts afterwards.
Made with this tool
All makes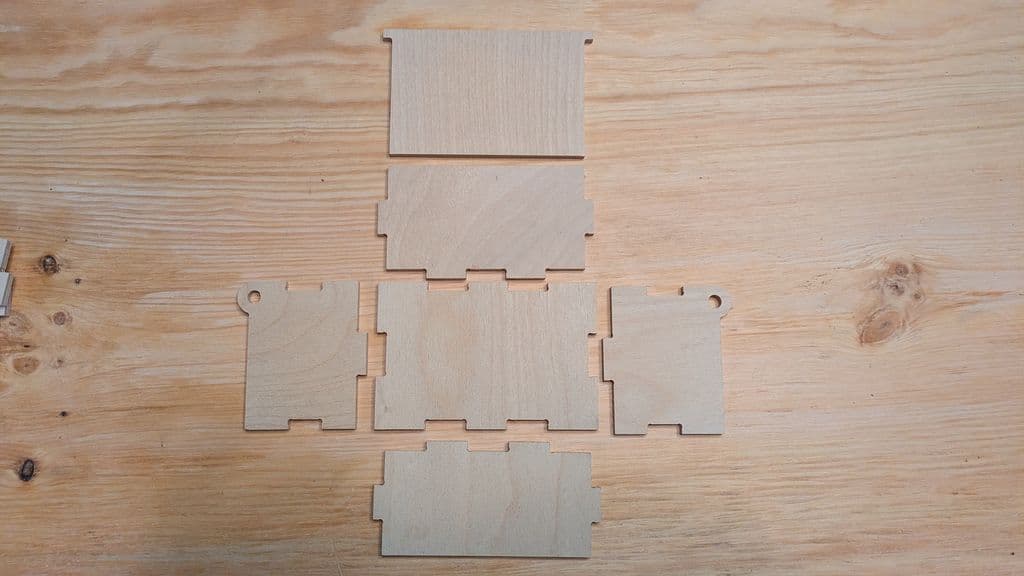
Design for free in the tool above, export as SVG, DXF or PDF. See all tools or compare plans.